Creative ideas come when you least expect them. From a few magazines to hundreds of ads in the email box. Some will be good and some not so good. But when do we find the time to do them all? This is the question we all face as crafters. The next question is do I have the supplies? Supplies do play a major factor into whether or not we work a particular project. It may be that we are just a few supplies short or need a lot or even have it all. In either case, we need to begin some form of planning to get to the end result.
Disclaimer: Not all links are affiliate links. Affiliate links are provided at no extra cost to you. Each completed purchase from affiliate link provides me a small commission. Thank you in advance for your purchase.
First let’s take a look at a project. Assess the need for certain supplies. Do some research on the cost of supplies. You may find that the project you chose maybe out of your budget range. Do you have friends and family that can help you with the supplies in some way? Or perhaps a junk store or good will? It may be that you will have to save up a few pennies to get the necessary supplies.
I’m not here to toot my own horn, but I know the struggle and it’s real. I don’t always get the supplies I need for a particular project. Sometimes it takes me years to complete that one art project that I dreamed of for years. Trust me some projects are worth waiting for. For example: Home wooden signs decor. Oh how I love these signs. The more nostalgic they are the merrier for me.
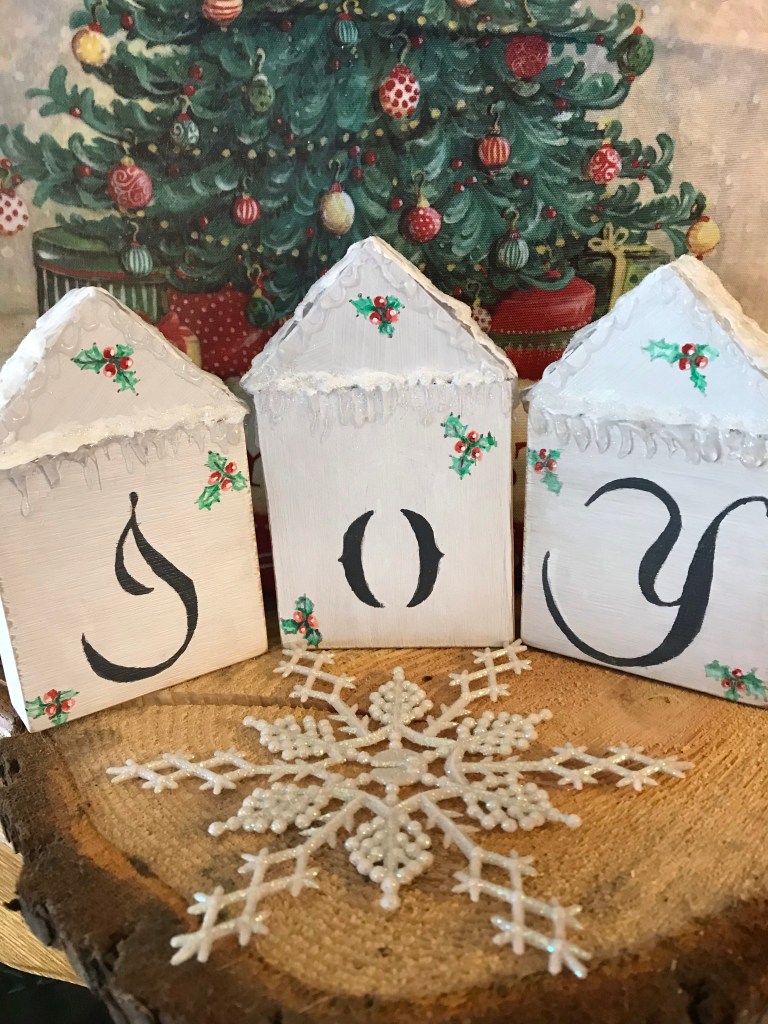
Case in point: Christmas wooden sign that says joy. See picture below. One day my spouse comes home with some particular bags of wood pieces. I have a fetish for wood pieces. I’m a kid in a candy store and want them all. I knew I had to share so I left a few for the spouse. I have been tucking these treasures away for later use until I saw the joy houses. Then it hit me! I’ll just make my own. Luckily I had the right pieces to make my first one. It’s not exactly like the one in the ad but it’s similar. I’ve even added my own details just to make it that extra special.
If you wish to make your own set of joy houses below is the supply list and instructions on how I made mine.
Supply list
- Wood glue
- Hot glue sticks
- Hot glue gun
- Wood
- Gesso (white)
- White acrylic paint
- Paint brushes
- Slate gray or black
- Letter stencils
- Red acrylic
- Pale red acrylic
- Green acrylic
- Dark green acrylic
- Regular glue
- Extra fine transparent glitter
Directions
Base: Three square wood blocks of the same size (approx. 31/2 in. x 31/2in x 1in).
Roof: Three triangle shapes of the same size and slightly wider than the three blocks. Length is slightly longer than the base (approx. 3 3/4 in long x how ever tall you want your pitch to be.) Width is slightly wider than the base by 1/8″ on each side.
NOTE: My pieces of wood were scraps and already precut.
Glue: Using Wood Glue adhere the roof pieces to the bases. Hot glue and glue gun can be used to help move things a little faster. Using both works well too. Set aside to cool.
Primer: Once the wood forms are cooled each needs to be primed with gesso or some other form of primer. I used (white) gesso for mine. Using a paint brush paint each side. Allow to dry. (Note: Using your good paint brushes are not ideal.)
Painting: Once the primer has dried and all sides are primed with gesso. Using white acrylic paint and a sponge brush or paint brush. Paint all sides dry in between. You may need to paint in sections. Allow to dry for at least 24hrs.
Letter Stencils: Picking your letter stencils to fit the size of your blocks. Lightly trace the letter with a pencil. (the heavier the lead tracing the more it will show thru) The stencils I used are from https://www.artskills.com purchased from https://www.dollargeneral.com.
Paint: Using your favorite brand name acrylic paints. Paint in the letters. Allow to dry. I used slate gray available from https://www.walmart.com. I’m sure you could purchase from https://www.amazon.com.
Paint: Once the letters have dried using your favorite Acrylic red and green paints. Hand paint on (Red) circles in the set of three leaving space in between. Allow to dry. Next hand paint in holly shaped leaves with green paint(s). Allow to dry. Add a dot of white to the side of the berries to give the illusion of a shine. For my leaves I used three different color of green. Adding a touch of brown to the leaves and in between the berries gives the illusion that they came right from the holly tree. All the colored paints for this step can be purchased from https://www.walmart.com or https://www.amazon.com.
Ice cycles and snow covered roof: Using a hot glue gun and hot glue starting at the bottom of the roof make loops of hot glue. Allow to cool in between. Over lap the layer of hot glue until you reach the center of the roof. Allow to cool entirely.
Where the seam is at to attach the roof to the base is where we put the ice cycles. Ice cycles can be added along the roof line if you wish. Allow to cool
Paint: Using white acrylic paint finger paint the roof on top of the hot glue. A paint brush can be used. Allow to dry.
(note: I left the ice cycles clear)
Sparkle the snow: Using regular glue and crystal clear glitter add lightly to each roof. I obtained my Glitter from https://www.walmart.com and the glue is Aleene’s Tacky Gel available at https://www.aleenes.com.

