Here at Colorful Dimensions 2 Arts after long days working behind the scenes on administrative projects, its time to work on a card front. For the beginning of the project a 1/4 panel from a 8″ X 10″ is used. Using my most favorite ruler proceed to measure equal 1/2″ nicks on either side using my favorite pencil. Careful to note the center of the 1/4 panel. The center is important to note because that’s where we begin our image stamping. More on this later. Back to measuring nicks. After they are all measured out and made certain that’s where the nicks should be. We then want to draw lines and making sure that they are all even. It may take a few tries to get them perfect.
Disclaimer: I am a Amazon associate and the links provided are for you to use at no extra charge. I earn a small commission on each completed sale. Note: Mindless Crafting is not endorsing nor is affiliated in any way with me. There link is posted for your convenience and any sale that arises from your purchase does not provide me a commission.
(Note: Create lines ever so lightly. Pencil lines have a tendency to show threw or end up being hard to remove if they are pressed into the paper to hard. )
Create lines all the way across ever so lightly. Double checking that all the lines are straight. When you are happy that they are straight then the next step begins.
I am using a very small stamp from a set I bought a few years back called “Thank you Stamp Set” by https://www.mindlesscrafting.com. The ink I choose for this project is by https://www.hamptonarts.com purchased from a local chain store. Starting in the center of my 1/4 panel I created this flower with this one stamp. Finding it rather kind of neat I precede to make more spacing out the flower arrangements and doing my best to keep in between the designated spaces. Letting them dry completely before preceding. Below is an alternative place to purchase your set of Hampton Arts ink cubes and cardstock.
I can say that my ruler and my makers I absolutely love. I would purchase them again.
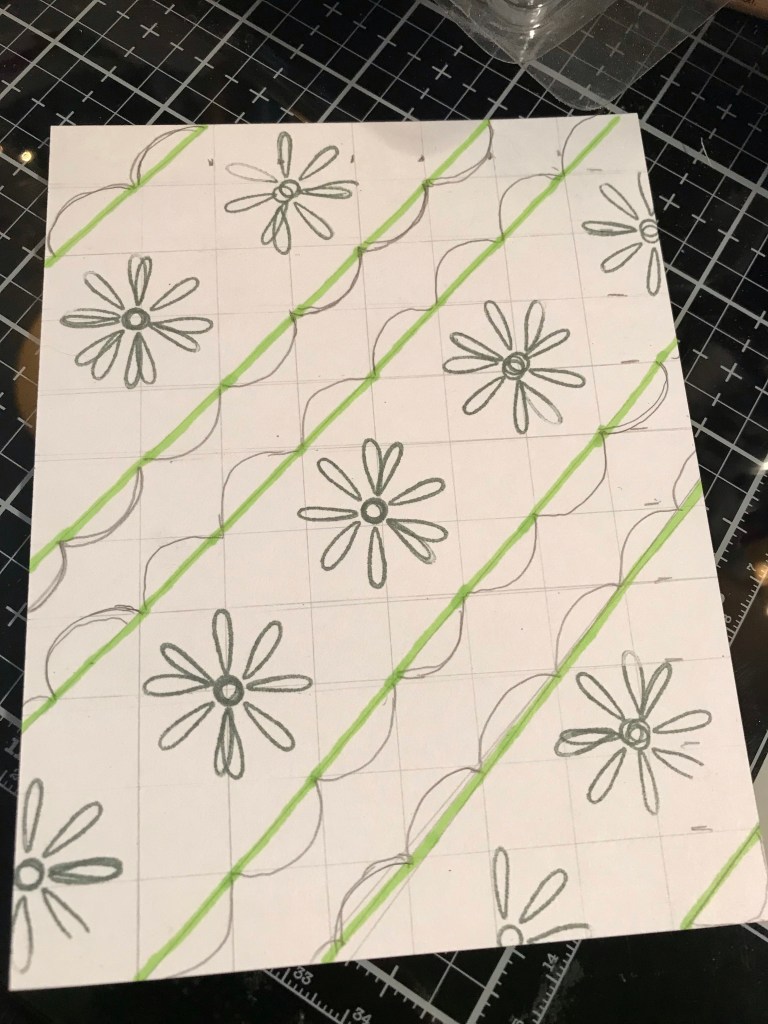
By taking one of the green markers I blocked of triangles and filled them in. I did this on both sides of my stamped images. Once I had them filled in, taking a orange marker traced just the outer edge of each triangle. Going over the top with a (Red ultra fine permanent maker.
I love my micron pens that I use them a lot. By buying a larger a set means I have less worry of running out of ink.
Using a pencil make loops to mimic scallops. Then in the center of each draw a small circle. On either side of the circle draw upside down tear drops. After all are drawn in and your happy with the look. Fill it all in with the black micron pen. Now when this dries you will want to heat set this. If you choose not to that’s fine but later when you get ready to erase your lines you will run the risk of smearing your micron ink. As you can see from my own mistake.
After heat setting then color in the flowers and the white area around the flowers of your color choice using your favorite Color pencils or you can purchase your own set.
This step is rather easy. Taking a A2 size card base and creating a black mat for it. Now my products are from other companies but I have included some that are really close to what I use. I will mention that I use a guillotine to make the black paper into 1/4 panels from one sheet. Giving 4. Trim each panel another 1/8 th. inch off of each side. Two of which will be used for this card. One for the inside and one for the outside. Glue the black mats to the card base.
For the top card mat you created you will need to trim it down (1/2 inch on two sides , length and width) to fit within the black card mat leaving a black strip of 1/8 th. inch showing. At this point you can adhere to card base.

If you made it this far and your card looks like mine: Congratulations! But we are not done yet. The front needs a sentiment and the inside front panel needs to be completed. I cheated and made my own by hand lettering the sentiment on 2″ strip about the length of the card. First finding the center going each direction and laying down my pencil mark. Then above the mark going length wise 1/2′ from the line add another pencil mark. Then turn it around and repeat. so that when done there are three lines. And one line down the very center.
Wording: (THINKING OF YOU) was divided into equal number of characters. Starting with the later half lightly pencil in the shape. Fill in with micron pen. (or cheat and just use a stamp set with what ever sentiment you wish). I started with a calligraphy pen and it died on me so I had to pivot to get the same look and color. Don’t forget to add the black mat behind your sentiment leaving a visible strip of 1/8″ all around. Glue it.
Inside panel: This is also white card stock and trimmed down after the desired sentiment is achieved. Using the same method as above and finding the center hand lettering a sentiment pretty much the same way. You can cheat here as well. I was just too lazy to dig thru all the stamps for what I wanted to achieve. Plus, the inside stamp sentiment needs some updating in my collection. Glue inside panel.
After every thing is dry. Go ahead and heat set your sentiments. Then erase your pencil marks that you don’t want visible.
Tip: if you used a micron pen and lost some of your shape when filling in. A white gel pen works great to re create the achieved look.
If you have questions I am more than happy to answer them. If you want to know more about projects like this or where I get my products from then don’t hesitate to sign up.

